

How to Dye Easter Eggs
Dying Easter Eggs
When I was a kid, we used to dye colourful Easter eggs every year to use as decorations and for Easter egg hunts.
Dying Easter eggs is a fun tradition and a great holiday activity for the kids.
What type of eggs to use for dying
You can use chicken, duck or any other light-coloured egg for dying.
In our house, we always used hard-boiled eggs for dying. But you can also use hollow eggs, which are just a hollow egg shell. Both options have their positives and negatives.
Use hard-boiled eggs if you’re looking for a fun activity for kids. They are a lot easier to handle and less-breakable (and can still be eaten if they break!). But they do need to be kept in the fridge, so they aren't great decorations.
Hollow eggs make long-lasting decorations that don’t need to be refrigerated. But making hollow eggs is more time-consuming and they are much more fragile, so they aren't great for kids!
How to dye eggs
Equipment
Food colouring (food dye)
Vinegar (white or apple-cider vinegar)
Hot water (from a boiled kettle)
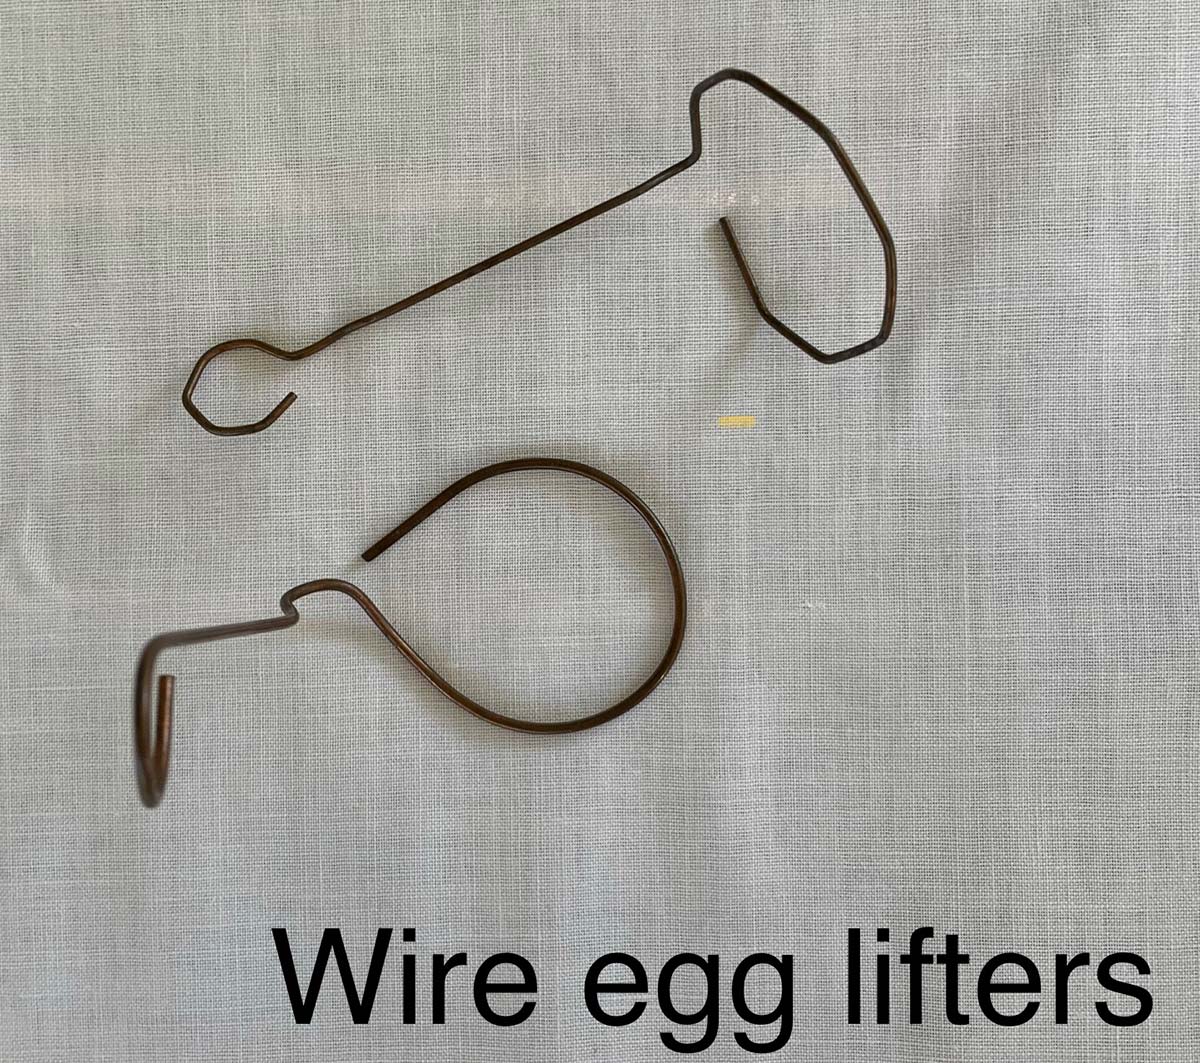
Wire egg lifters or spoons
Mugs, cups or bowls
Hard-boiled eggs (still warm) or hollow eggs (dry)
Instructions – Basic process for dying eggs
1. Make the dye
Mix 1 cup of hot water with 1 tablespoon of vinegar and a few drops of food colouring.
Leave room at the top of the cup or bowl, as the water-level will increase when you add an egg.
We usually make primary colours, do our first round of dying and then mix the dyes to make green, purple and orange.
The more food colouring you add the darker the colour will be and the quicker it will stain the egg shell.
2. Decorate the eggs (optional, see instructions below)
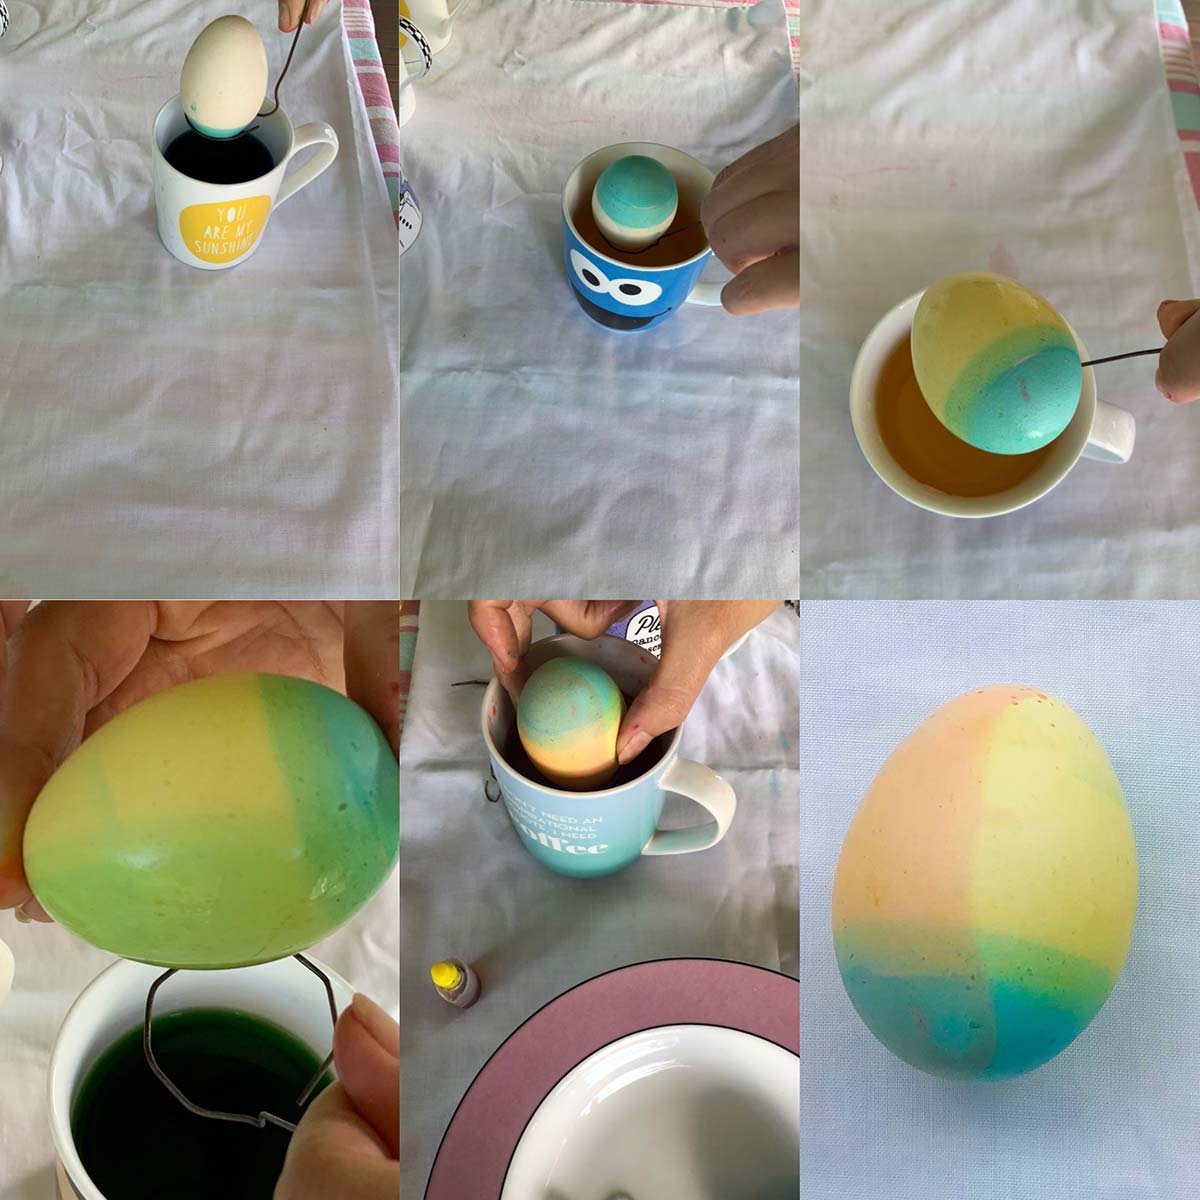
3. Dye the eggs
Using the wire egg lifter, a spoon or your fingers, place eggs into the dye.
The amount of time spent in the dye will determine the intensity of colour. Eggs usually need 1 minute to set the colour but can stay in the dye for 5-10 minutes.
Check the tone after a minute or so by lifting the egg out of the dye.
You can partially dip and double dip, so get creative.
You can absolutely still dye hard-boiled eggs that have cracks. The dye will leak in, but as long as it is food-safe the eggs will still be edible and kids love eating the colourful egg!
4. Dry the eggs
Dry eggs in an egg holder or on an old towel that you don’t mind staining. If you dry them in an egg carton they will stick to the cardboard.
Dry fully before re-dipping to avoid bleeding or mixed colours
Clean and dry the egg holder between eggs of different colours.
Decorating dyed eggs
There are hundreds of ways to decorate dyed eggs using materials found around the house.
Here are a few of our favourites:
Double-dipping
Dip different parts of the egg into different colours to make a masterpiece. Start with the darkest colour and dry completely between colours.
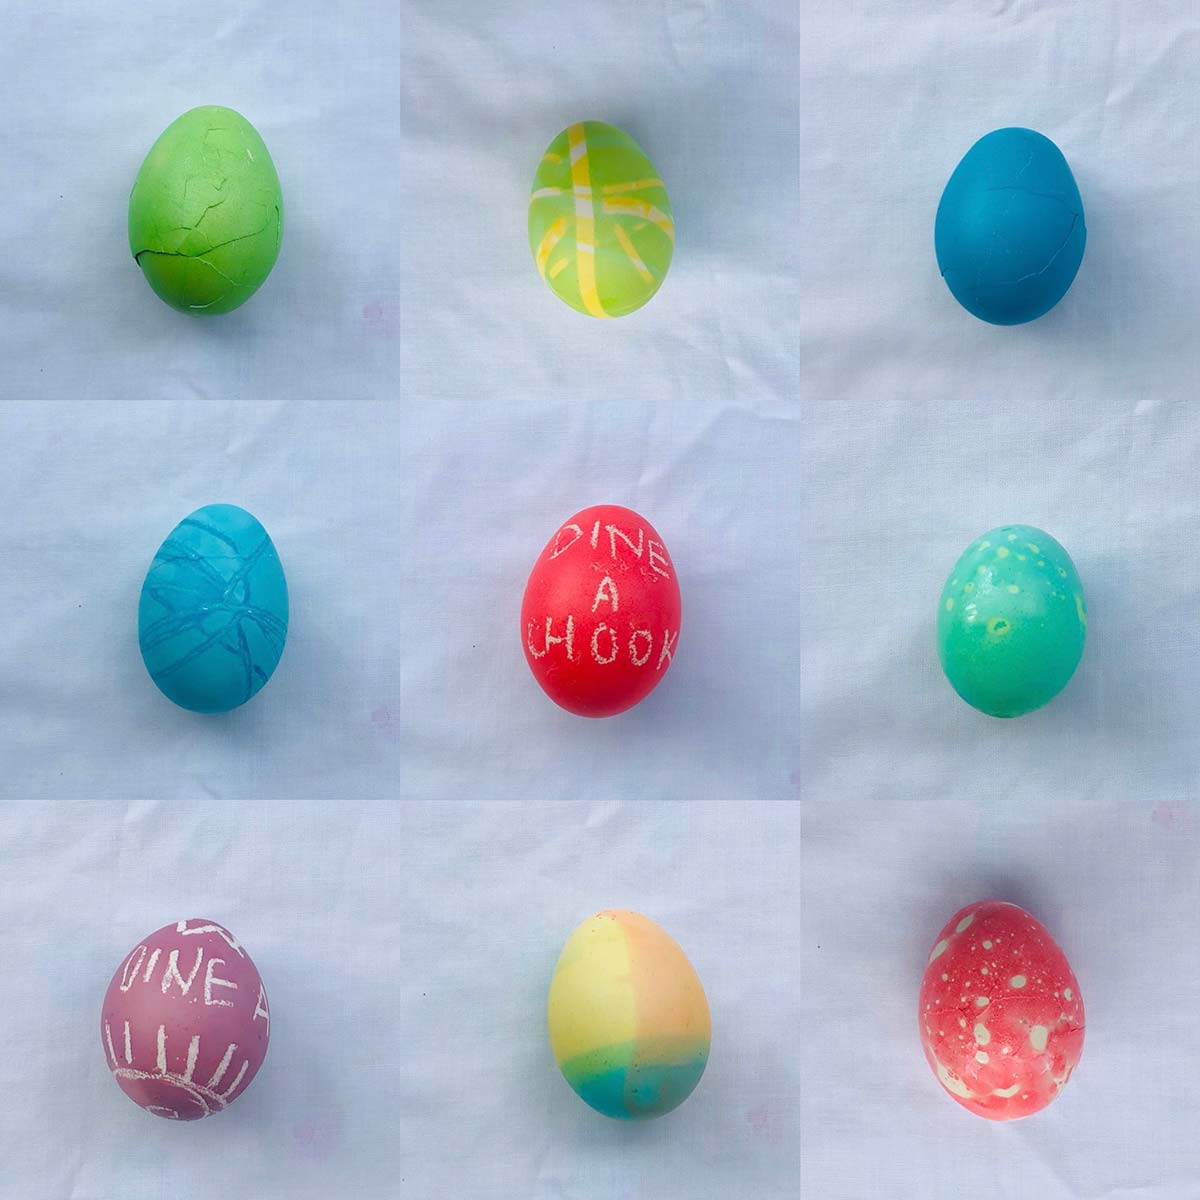
Crayon or wax designs
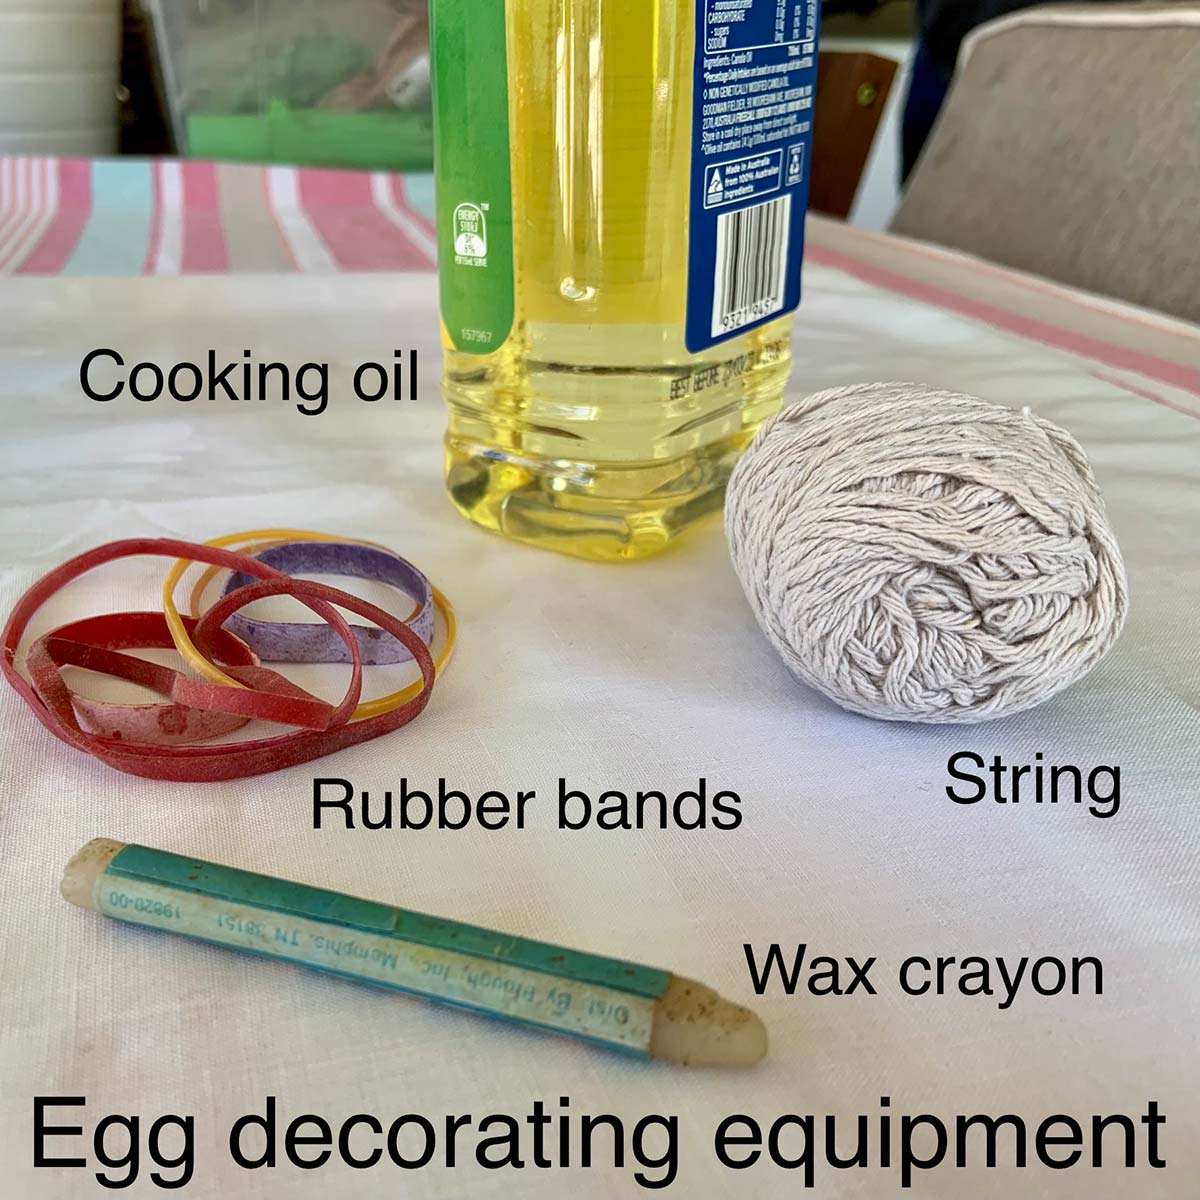
Draw on the egg with crayon or wax. This will stop the dye from setting, creating different designs or even words. If you are eating the eggs, ensure the crayon or wax is non-toxic.
Rubber bands
Wrap the egg in rubber bands before dying. Where ever the rubber bands touch the shell will be free from colour. You can also allow the egg to dry, remove the rubber bands and apply them again, then re-dye the egg with a different colour, like the yellow and green egg at the very top of the page.
String
This produces different results depending on the type of string. Plastic or wax-coated string will stop the shell from dying where it is in contact, similar to rubber bands. String that is a natural fibre and uncoated will soak up dye and leave a darker line where it touches the shell.
Oil
We do this last, as it spoils the dye. Add a teaspoon of cooking oil to the dye and aerate well with a fork. You want to see little bubbles on the surface of the dye, not a big slick. Quickly dip your egg and leave to set colour. Where the oil bubbles adhere to the surface, the dye will not stick, creating a pretty pattern. You can do this over the top of a lighter colour.
How to blow eggs to make hollow eggs
If you wish to make a hollow egg for decorating, you will need a pin or a thin metal skewer no more than a couple millimetres thick.
- Create a hole in the top of the egg using the pin or skewer.
- Turn the egg over and make a hole in the bottom of the egg, being careful not to break the egg or crack the shell.
- Using the pin, widen the bottom hole slightly and move the pin around to break up the yolk and white as much as you can.
- Turn the egg back up the other way and hold over a bowl or cup.
- Blow into the top hole until the egg feels empty and you cannot hear liquid moving around when you shake it.
- Allow the egg to dry out for a few days before dying.
Happy decorating!
Rachael at Dine a Chook Australia